Sunday, December 5, 2010

Thanksgiving 2010

I really wish I had a great blog to share this year. Heck, I wish I could have just reposted the awesome one from last year where I rocked that sagüesera turkey (thanks to @vicequeenmaria for the name) stuffed with Congri.

But no, unfortunately, this year’s contributions to Thanksgiving from The Project were lackluster, to say the least. And the fact that I was out of commission a whole week afterwards didn’t help the cause, either.

So now, I present…Thanksgiving, Nitza Style, 2010 Edition. The good, the bad and the bien feo (very ugly).

The good:

My mom made her spinach dip, which she has perfected over the years. No leftovers on that one, that’s for sure. It’s usually consumed way too fast to have anyone leave anything but the scraps of the bread bowl she serves it in.

My cousin, Hilda, made an Empanada Gallega for appetizer. Homemade dough filled with picadillo. Super great. Even better the next day after a little toasting in the oven. Delicious.

My sister in law’s mac and cheese – excellent. Homemade, creamy, cheesy. Always a hit.

My cousin, Jessica, recreated Cracker Barrell’s hashbrown casserole. Excellent. She could have really bought it from CB and changed the pans and no one would have been the wiser. It was a perfect recreation and one I’ll try to get the recipe for.

My mother in law’s frijoles negros were impeccable. The reason I still haven’t tried to make Nitza’s recipe for black beans. The pressure is too intense to try to beat those black beans.

For the turkeys, hubby fried up just one of the two we had bought. He made a mojo garlic injection for it that kept that bird moist and very well seasoned through the frying. Perfect and juicy with a good amount of leftovers for the next day.

My aunt brought a turkey breast and the homemade gravy she makes is delicious. Both turkey dishes were well received.

I made two recipes from The Project for Thanksgiving. One appetizer and one side dish. The appetizer makes it to the good list.

Recipe #80: Jamón Enrollado con Piña

Ingredients for Jamon Enrollado con Piña

It’s a simple dish, can be made ahead and the glaze that you top it with is really outstanding.

I bought pineapple chunks pre-cut at the grocery store and then cut them up into smaller cubes and ran them through water and salt, because Nitza says so. Maybe it’s to soften the sugar flavor, or maybe it’s to prep it for the sugar rush that it’s about to get when you put the pineapple chunks in sugar and water. Not sure the reason, but it works and the pineapple gets coated with a candy-like glaze that makes it taste great.

At this point, I let the pineapple cool and prepped the ingredients for the glaze. It was time for Nena’s sweet potatoes and Tia Gladys’ Thanksgiving lunch with my father in law’s side of the family.
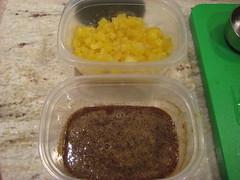
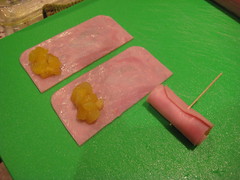
Prep for the ham rolls

When we got home, I placed the pineapple chunks in a slice of ham and held it together with a toothpick.

Rolling the ham

My cousin, Sandra, helped me finish and line them all up in a greased Pyrex and poured the glaze over the top. Ready for the oven.

That’s where the good list ends. Now we start the bad list.

Actually, there’s a fine line between the bad list and the bien feo list.

The Publix ham I bought was to recreate a Cuban-dressed ham that Nitza has an illustration of in my book. I just had to cook it, glaze it and put fruit around it and I’d be able to match the illustration, just for fun. At least it looked pretty.

Cuban Ham

I didn’t love the glaze it came with. Don’t know if it was that it had too much of a clove presence, or another spice I can’t put my finger on, but it was too overpowering. There are glazes that Nitza talks about in the book, but since it’s more of a four page instructional section on Ham, I never counted any recipes from these pages into the overall 629 recipes from The Project.

Why the fine line between the bad list and the bien feo list? Well, in our exhaustion, we had forgotten to put the ham away in the fridge. The smell in the morning of the rancid ham was so overpowering, even after wrapping it, discarding all traces of it and Lysol-ing the kitchen, the smell lingered. I even thought of boiling anise star, but that would have reminded me of the glaze I was not loving more and more and decided against it. The ham jumped into the bien feo list quickly.

What about the second recipe from The Project you ask?

Recipe #143: Receta Para Relleno de Pavo
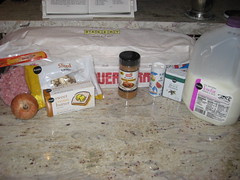
Cuban stuffing ingredients

Cuban Stuffing. During my prep, many of you asked if there was such a thing as Cuban Stuffing and I thought, heck, it’s made with Cuban bread so yeah, it’s Cuban Stuffing.

I now know that there’s a reason no one thinks of doing stuffing the Cuban way. I don’t know if the measurements table Nitza displays in the book is just totally off or what, but I, personally, hated the Cuban Stuffing. It was salty, too mushy and oh so gross.
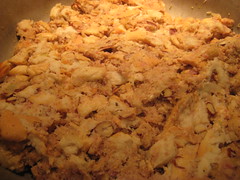
Cuban Stuffing

Some family members tried to make me feel better by saying their portion wasn’t salty, but I don’t believe them.

And then, for the ironies of life, I’ll share with you why we don’t even do stuffing or dressing at our home for Thanksgiving.

When my husband and I first got married, I announced that I’d be contributing an apple and sage stuffing for that year’s Thanksgiving. I slaved all night with some ridiculous Martha Stuart-ish recipe, sliced my finger with the tool of the devil (the mandolin) and went to sleep probably close to sunrise in the process.

No one in the family ate the stuffing. No one. Well, maybe just one person – Javi. I think he felt so bad for me that he tried it. And hated it.

And this year, the only other year I’ve made stuffing, I had to hear about how no one in the family likes stuffing. I don’t know what’s wrong with these people, but they just don’t like stuffing.

And when the stuffing was ready, I asked Javi to try it and he did.

And he liked it. I actually caught him going back to the stove a few times to keep trying it.

Stealing from the stuffing

Go figure. It’s safe to say I’m done with stuffing. Unless it’s Stove Top, which I just love. Then I can have it for myself anytime of the year.
Sunday, September 12, 2010

Arroz con Salchichas - La Cocina de Christina original recipe

Arroz con Salchichas is something I didn't grow up with. I know many of you did, but I didn't. My mom made hot dogs and my mom made rice, but she never mixed them up. The first time I had arroz con anything that resembled a hot dog was when my hubby and I were kidless and took an anniversary trip with our friends around the British Virgin Islands. My best friend, Diana, made arroz con spam. We were on a boat for crying out loud. Gross. End of arroz con anything.

When I started this blog, I had folks tell me about Arroz con Salchichas and I searched the book high and low but couldn't find a Nitza version to Arroz con Salchichas. So, I decided to go cheater-style and create my own version, with a little help from Louisa.

Arroz con Salchichas, cheater style

1 Tablespoon Olive Oil

1 small yellow onion (if you have it)

1 garlic clove (if you have it)
2 10oz packages Vigo Saffron Yellow Rice


2 10oz cans Armour Vienna Bites (salchichas that come pre-cut)


1. Heat the olive oil in a deep pot.

2. Add the onion, chopped and the garlic, minced - if you have it.

3. Drain the liquid from the salchichas cans into a measuring cup (should yield about 1.5 cups).

4. Add the salchichas to the olive oil (and sofrito).

5. When salchichas are golden, add the liquid from the cans plus 3.5 cups water. In total, you should add 5 cups liquid (some have suggested using beer or white wine, but I've used water until now).

6. When the liquid starts to boil, add the 2 pouches of yellow rice.

7. Stir.

8. When all that comes up to a boil, stir again and cover.

9. Cook on low heat for 30 minutes.

Serve hot with maduros, a fried egg on top (thanks, CAB), or alone.

I found out later on that Arroz con Salchichas is in Nitza's book as a variation to Arroz con Camarones. So I'll make it, one day, when I've got lots of time to spare. But until then, and then again after then, it's this cheater meal that can be made on any weeknight all the way.

¡Buen provecho!

Sunday, August 1, 2010

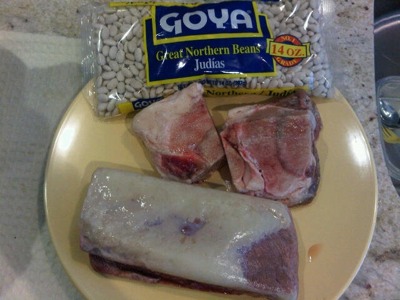
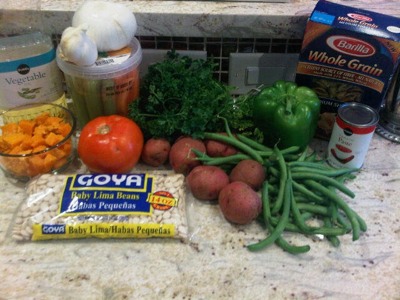
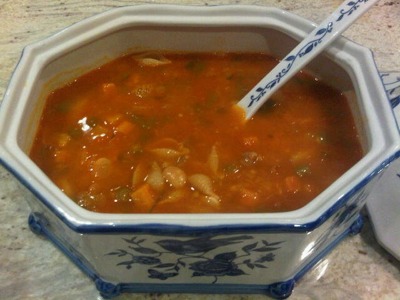
102: Minestrone (Sopa o Cocido Italiano)

Ingredients:
1lb flank steak
1/2 pound soup bone
1/2 pound Judias (Great Northern Beans), soaked overnight
14 cups water
1 Tablespoon salt
3 Tablespoons oil
2 garlic cloves
1 onion
1 green pepper
1/4 cup parsley, chopped
1 cup carrots, chopped
1 cup baby Lima Beans
1 cup fresh green beans, chopped
1 cup squash, cubed
1 cup potatoes, cubed
1 cup tomatoes, chopped
1/2 cup celery, chopped
1/2 cup tomato paste
1/4 teaspoon black pepper
1 teaspoon salt
1/4 pound macaroni, cut into 1" pieces, or other 1" pasta shape


1. Cut all the veggies into small pieces.
2. Wash the soup bone and meat.
3. Cut the meat into 2" pieces.
4. Place the meat in the pressure cooker, along with the soup bone, beans, water and salt.
5. Once the pressure sets, cook over medium heat for 30 minutes.
6. Remove the bone from the pressure cooker.
7. In a large skillet, heat the oil.
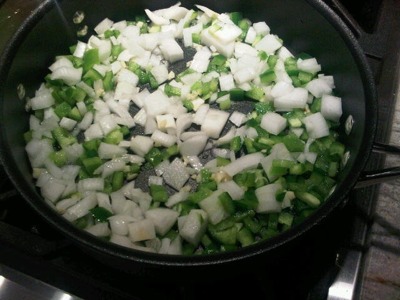
8. Fry the garlic, onion, green pepper until softened.


9. Add the trilogy to the contents in the pressure cooker.
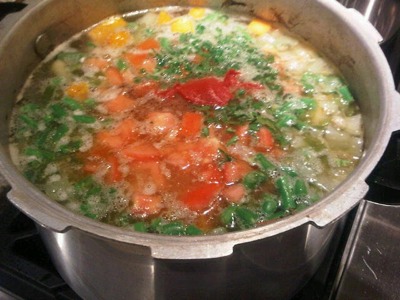
10. Add the rest of the ingredients to the pressure cooker except the macaroni.


11. Cook over medium heat, uncovered, for 25 minutes.
12. Add the macaroni.
13. Cook over medium heat, uncovered, for 10 minutes.


Makes 12 servings.


- Posted using BlogPress

Saturday, July 31, 2010

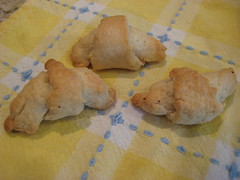
100: Cangrejitos de Jamón (Ham Pastelitos)

Ingredients:
Dough from Receta Basica No. 3
Ground ham (cooked), approximately 1/2 pound
2 eggs, beaten (for the egg wash)

Preheat oven to 400 degrees
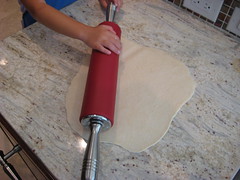
1. Roll out the dough on a flat surface, using a rolling pin.


IMG 1090


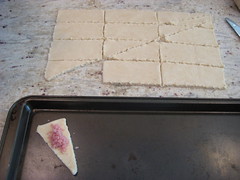
2. Cut the dough into triangle shapes (4" in length by 2" in height).
3. Place a spoonful of ham in the middle of each triangle.


IMG 1096


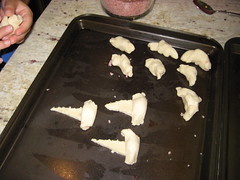
4. Roll up the dough, twisting the ends down, to make a crab shape.


IMG 1100


5. Brush each cangrejito with the egg wash.
6. Bake them on ungreased cookie sheets for 20 minutes.


IMG 1116


Makes approximately 30 cangrejitos.

101: Receta Basica de Masa #3

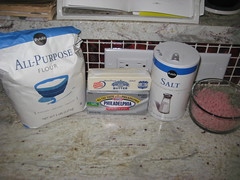
Ingredients:

IMG 1073


2 cups all purpose flour
1 teaspoon salt
1/4 lb butter, divided into four pieces
6oz cream cheese

1. Sift the flour and the salt in a large mixing bowl.
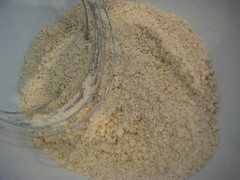
2. Add the butter and mix well, using a pastry cutter until you get a sand-like consistency.

IMG 1083


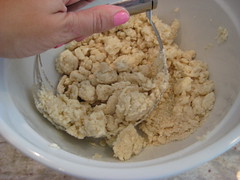
3. Add the cream cheese and mix until the dough forms into pea-sized balls.

IMG 1085


4. With your hands, gather the dough, form into a large ball and wrap with plastic wrap.
5. Place in the refrigerator until you are ready to use.

Wednesday, July 28, 2010

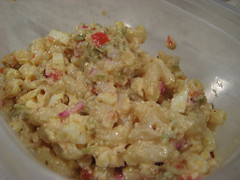
Coditos Deluxe (Ensalada Mixta de Macarrones)

Recipe #354: Ensalada Mixta de Macarrones

Never in my life have I had this pasta salad with every ingredient you can find in your fridge, chopped.

Seriously. It has: olives, radishes, onions, eggs, red bell peppers, Gouda and ham.

My typical ensalada de coditos (elbow macarroni), as my grandmother would call it, growing up had chicken, mayo, celery and apple. That's it. Maybe some petit pois (green peas) for good measure. Never olives, radishes, onions, eggs, red bell peppers, Gouda and ham.

Never.

So, this coditos deluxe, or redux, or whatever-ux, is quite amazing.

But, it's no wonder why my grandmother never made it this way at home. The amount of chopping needed to get those olives, radishes, onions, eggs and red bell peppers into perfect tiny squares is terrifying. So very terrifying. Good thing I had no idea how long it would take.

Else it would have been good ol' ensalada de coditos for me, abuela style. Not Nitza style.

But, try it. People will wonder at all the flavors you've placed in there. ALL the flavors.

Ensalada mixta de macarrones

99: Ensalada Mixta de Macarrones

Ingredients:

ingredients for ensalada mixta de macarrones

For the pasta:
1/2 pound elbow macarroni
6 cups water
1 Tablespoon salt
1 Tablespoon olive oil

For the dressing:
1/2 cup green olives, stuffed with pimentos, finely chopped
1/2 cup red bell pepper, finely chopped
1/4 cup white onion, finely chopped
1/4 cup radishes, finely chopped
1/4 pound ground sweet ham
1/2 pound Gouda
1/2 cup toasted almonds, crushed
4 hard boiled eggs, chopped
1 1/2 cups mayonnaise
2 Tablespoons white vinegar
2 Tablespoons mustard
1 teaspoon salt
1/4 teaspoon black pepper

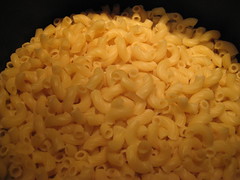
1. Boil the pasta in the water with salt and oil for 10 minutes.
2. When pasta is ready, run it under cold water and let cool.

macarroni cooling

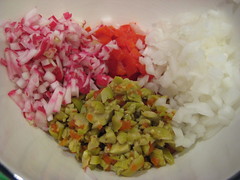
3. While the pasta cools, chop the olives, bell pepper, white onion and radishes.

chopped ingredients

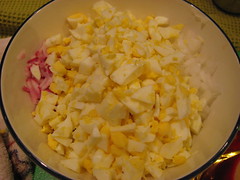
4. Chop the hard boiled eggs and add to the other chopped ingredients.

chopped egg

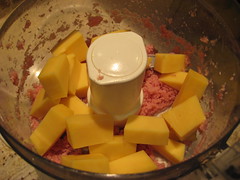
5. In a food processor, grind the ham and add the Gouda.

adding gouda to the ham

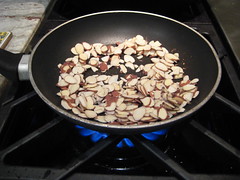
6. Toast almond slices over low to medium heat.

toasting the almonds

7. When the pasta has cooled, add all the chopped ingredients, along with the mayo, vinegar, mustard, salt and pepper (wet ingredients plus salt and pepper should be mixed in the food processor).

ready for the mixing

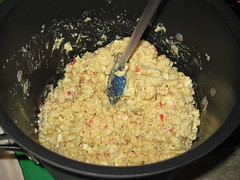
8. Mix well and serve cold.

mix well

Makes approximately 12 servings.

Monday, July 26, 2010

98: Platanos Maduros Fritos / Fried Sweet Plantains

Ingredients:
Very ripe plantains (black on the outside skin, mushy)
Vegetable oil for frying

1. Remove the skins from the plantains by peeling them with a sharp knife.
2. Slice the plantains, at an angle, about 1" in thickness.
3. In a pan, pour the oil until it comes up about 1" in height.
4. Heat the oil on high.
5. When the oil is heated through, slowly begin to add the plantain slices. Leave space between each slice (do not overcrowd the pan).
6. When the plantains begin to change color, turn each slice over.
7. When they are golden, remove from the heat.
8. Place on paper towels to drain excess oil.

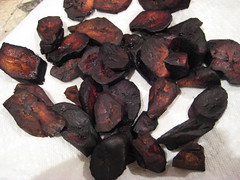
Maduros should be a dark brown in color and soft and chewy in texture.

Maduros (Fried Sweet Plantains) for Dummies

I made maduros once. And burnt them. Bad.


IMG 1020


So, while I've checked the recipe off my list, I know I will be faced with the inevitable task of making maduros as a side dish one day. But, as of right now, I can't help anyone much except to give you the advice I was given AFTER the arsonation of the maduros.

Advice? Yes, advice. The advice I didn't get before embarking on my fried sweet plantain mission from my friends on Facebook. Where were you when I needed you?

1. Black plantains required. (Read: black, mushy, soft, almost ready to throw away). Don't buy the plantains on the day you want to make maduros. They won't be ready. Buy them a few days early with black spots on them. They'll get to the right stage right in time for your frying.
2. Do not take your eyes off the maduros. At any point. Ever. One eye off the pan and they will burn. (Mica)
3. Do not use a cast iron skillet. Gets too hot and when your eye wanders, you get instant carbón in the pan. (Dina)
4. Remove platanitos from the oil when they are golden, not when they look ready. When they look ready in the oil, you've gone too far. (Dina, again. All-maduro knowing Dina)
5. Don't overcrowd the pan. Making them in batches is ok. You have more space to turn them if you don't overcrowd the pan. (Nancy)

And, of course, you're all thinking to give the same advice Raquel gave: buy the frozen maduros for the microwave. Taste just like the real thing.

If you have more tips to add for a Maduros for Dummies special insert at some point in the future, please post it below in the comments. Happy maduro'ing!

Sunday, July 25, 2010

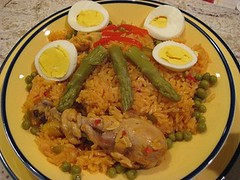
Arroz con Pollo

Arroz con Pollo is a family tradition. Not in my Flores family, but in your family, I mean. It is one of those recipes that has its own special touch and secret ingredients that make families beam with pride.

"Mi tia Bivi makes the best arroz con pollo in the world", I remember my husband telling me when we were only dating. Great. Best in the world.

Arroz con Pollo happened to have been another one of my least favorite foods growing up. My mom and grandmothers would make it, but I'd turn my nose up at it.

So when the book opened to Arroz con Pollo on a day I literally just closed my eyes and let the book pick what I needed to make, I can tell you I was less than thrilled.

I like it okay now, and Bivi's really is the best, with my mom's coming in right up there, but meh, I don't die over it.

Aside from the dish, you have so many family innuendoes to figure out.

A la chorrera (runny) or seco (dry)? I prefer in between.

Beer or wine? Tried Pinot Grigio because it was what I had an open bottle of in the fridge. Meh, not enough salt. Will do a beer and wine mix next time.

Azafrán (saffron) bloomed or dry? ¿Que?

When I made this recipe, I pinched some saffron and threw it into the pot, thinking the saffron would melt away into the liquid. Instead, I ended up having saffron flakes (or shreds) in parts of the dish. Double meh.

Since everything happens for a reason, I happened to have come upon Chef Norman Van Aken at a recent March of Dimes event. I know he is Mr. Caribbean, Cuban, Miami chef of all things so I asked him about my little bits of shipwrecked saffron.

"Easy fix", he said. I did a little dance in my head.

Let the saffron bloom in some hot water or stock. That way, the shreds will melt away and form a concentrated liquid of azafrán that you can then introduce to the dish.

Dude, that's why I like asking my random questions. He has no idea who I am but he gave me (and those of us suffering from saffron pieced dishes) such a gift.

Thanks, Chef NvA - our secret family weapons have now been enhanced.


1

97: Arroz con Pollo

Ingredients:
2 whole chickens (can be pre-cut, innards included in their own bag)
3 garlic cloves, minced
1 sour orange
1/2 cup vegetable oil
1 green pepper, chopped
1 white onion, chopped
1 can tomato sauce
2 cans pimentos
1 can green peas
1 can asparagus spears
2 Tablespoons salt
1/2 teaspoon black pepper
1 bay leaf
3 1/2 cups dry white wine (or white wine and beer)
2 cups chicken broth (made using the innards and bones from the whole chicken)
5 cups white rice
Pinch of saffron

1. Make a chicken stock with the bones, innards, tomatoes, onions, green pepper, garlic and salt. Or, use a low sodium store-brought brand.
2. Marinade the chicken pieces with the sour orange and minced garlic.
3. Heat the oil in a deep pot and put in the chicken pieces. Let them turn a golden color on all sides.
4. Add the onion, green pepper, tomato sauce, diced pimentos and their liquid, green peas liquid, asparagus liquid, salt, pepper, bay leaf and wine.
5. Ladle one scoopful of hot chicken stock in a small bowl and add a pinch of the saffron. This will allow the saffron to bloom into the chicken stock and you'll have an evenly distributed saffron color and taste.
6. Add the saffron infused chicken stock and the rest of the chicken stock into the pot with the rest of the ingredients.
7. Add a small canful of water to the pot.
8. When the contents start to boil, add the rice and mix well.
9. When everything starts to boil again, mix one last time, lower the heat to low and cover.
10. Cook for 30 minutes.

Serves 8, approximately. Can be decorated with the green peas, pimentos, asparagus spears and hard boiled eggs.

Thursday, July 22, 2010

96: Torticas de Coco

Ingredients:
2 egg whites
1 cup sugar
2 cups Corn Flakes
1/2 cup peanuts, chopped
1 cup shredded coconut
1/2 teaspoon vanilla

1. Preheat oven to 325 degrees
2. Beat the egg whites, with a hand mixer, until peaks form.
3. Slowly add the sugar and the remaining ingredients.
4. Drop by the spoonful on greased baking sheets.
5. Bake for 15-20 minutes.
6. Remove the torticas from the baking sheets as soon as they come out of the oven and let them cool on racks.

Makes approximately 36 torticas


- Posted using BlogPress

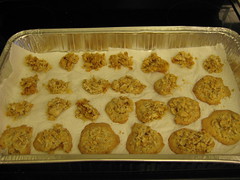
Torticas de Coco

This recipe lives in the Galleticas chapter, so I thought they’d be cookies. Silly silly.

Recipe #495: Torticas de Coco

We were on our annual beach vacation in Sarasota and I had most of the ingredients for this recipe on-hand. I was missing the coconut, a pretty key ingredient, but, at least once a day, someone from our family hits the grocery store, so I had my shredded coconut within a few hours. I was also missing the Corn Flakes that were part of the ingredients, but because my mother-in-law purchased a lifeboat-sized box of Frosted Flakes at Costco before the trip (my father-in-law likes Frosted Flakes. I saw him eat Frosted Flakes once during the week-long vacation), I decided to help the Frosted Flakes usage.

I was pretty much on easy-street until the end, when I realized that was I was making was more like merenguitos de coco and not coconut cookies. Sure, the first part of the recipe called for egg whites to be beaten until soft peaks form. But it wasn’t until the cookies, I mean, merengues, came out of the oven and weren’t sticking to their cookie-shape that I realized that this would have been a kick-ass recipe if I would have formed little merengue kisses like my best friend’s mom, Rosana, taught me for her famous chocolate chip merengues.

IMG 854

Putting the mixture of the beaten egg whites, sugar, corn flakes, chopped nuts, shredded coconut and vanilla all in a pastry bag (or Ziploc with the tip cut off) and squirting out hershey’s kiss-shaped merengues is the way to go on this next time. If any of you give it a try, let me know. I’m moving on to the next tortica recipe. There’s plenty to go.

Sunday, July 18, 2010

95: Camarones al Horno

Ingredients:
3 pounds shrimp, peeled, deveined (fresh or frozen)
2 teaspoons salt
1/4 teaspoon black pepper
1/2 cup beef broth
2 Tablespoons dry white wine (or white drinking wine)
1/4 lb butter
6 garlic cloves, minced
6 Tablespoons parsley, chopped
1 1/2 cups bread crumbs

1. Pat the shrimp dry with a kitchen towel or paper towels.
2. Sprinkle the shrimp with salt and pepper.
3. Distribute the shrimp evenly in six greased ramekins, or in one large glass or aluminum greased pan.
4. Pour the beef broth and wine over the shrimp.
5. In a saucepan, melt the butter and fry the garlic until golden.
6. Add the breadcrumbs and parsley to the butter and garlic and mix well.
7. Add this mix over the shrimp evenly.
8. Bake in a 400 degree oven for 15 minutes.

Makes 6 servings.
To view the blog post, click here.

Shrimp You'd See on a Red Lobster Menu

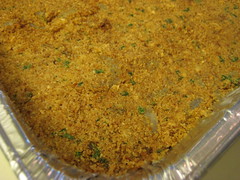
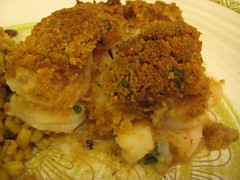
Camarones al Horno, or, Shrimp in the Oven really doesn’t say much as the title of the recipe. My sister in law named this one, "Shrimp You’d See on a Red Lobster Menu". I’d have to agree with her. Where in the world did this one come out of? I don’t think I’ve ever met a Cuban house that served this regularly.

Recipe #129: Camarones al Horno

IMG 517

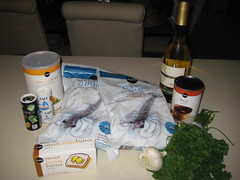
We had my brother-in-law and some friends over for dinner one night during our week-long beach vacation in Sarasota. I went to the grocery store when the 4pm rain showers hit and the kids had been put down for their nap – a usual routine for our family as someone has something to go to the market for at least once a day. I really picked this recipe out of the air, and boy am I glad I did. What a gem.

The fish dude at Publix gave me the idea to go with frozen shrimp instead of fresh because I was on vacation and didn’t need to be deveining and shelling the shrimp (his idea). They were also cheaper. Less work, less money. I was convinced.

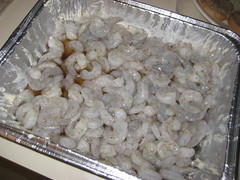
I defrosted the shrimp, patted them with paper and dusted them with salt and pepper. The recipe calls for the shrimp to be divided between six little Pyrex dishes, but since we were at a rented beach apartment and we were expecting over ten guests for dinner, I went with an aluminum pan and poured the shrimp right in. I poured some consommé (which I am almost 100% sure is beef broth) and white wine over the shrimp and let it sit all together while I went to make the crust.

IMG 528

Crust for the dish. Enter the thoughts of Red Lobster cheesy biscuits and shiny butter pools.

I melted down a stick of butter in a hot saucepan and added minced garlic. The recipe calls for the garlic to be added in and removed when golden, like when I make my Killer Rice, but I minced the garlic and left them in. When they browned up, I added bread crumbs until they were well coated with the butter garlic and then I added parsley. This crust is spread over the shrimp that were getting drunk in the white wine consommé juice.

IMG 536

When our guests arrived, I popped the pan in the oven at 400 degrees for about 20 minutes, or until the crust is Red Lobster worthy. That gave us just enough time to peek outside and see the sunset.

IMG 538

I’m really curious to see if anyone has had it before and if they have any memories to share. I swear this has been one of my favorite dishes so far, in a non-Cuban sort of way.

IMG 577

Friday, July 16, 2010

94: Carne Fria

Ingredients:
1 pound ground chuck (80/20)
1 pound ground pork
1/2 pound ground ham
1 small onion
2 garlic cloves
1 Tablespoon salt
1 Tablespoon mustard
1 teaspoon Worcestershire sauce
1/8 teaspoon black pepper
1/8 teaspoon ground nutmeg
1/8 teaspoon cumin
1/8 teaspoon oregano
4 eggs, beaten
1 cup galleta molida (ground cuban cracker meal)

For the breading:
6 eggs
1 cup galleta molida

For the boiling:
1 onion
1 Tablespoon salt
2 garlic cloves
1 bay leaf
1 teaspoon black pepper
1 teaspoon cumin
1 teaspoon oregano
Water to cover the rolls

1. In a food processor, blend the meats, onions and garlic.
2. Remove the ground meat mixture and place in a large bowl.
3. Using the same food processor, blend the salt, mustard, Worcestershire sauce, spices, eggs and ground cuban crackers (galleta molida).
4. Add the second mixture to the meat mixture and combine well, using your hands.
5. Use your hands to shape the mixture into three rolls.
6. Dredge one roll in the egg.
7. Dredge the roll in the galleta molida.
8. Repeat 6 & 7.
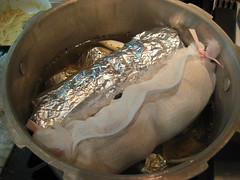
9. Place the breaded roll onto a piece of cheesecloth, or aluminum foil.
10. Close each end tightly (can use twine for the cheesecloth method or twist the aluminum well if using foil).
11. Repeat 6-10 for the remaining rolls.
12. Place all rolls in a pressure cooker with the onion, salt, garlic cloves, bay leaf, black pepper, cumin and oregano.
13. Cover the rolls with water (make sure you do not pass the pressure cooker's water safety line or limit).
14. From the time the pressure cooker reaches the correct pressure, cook for 25 minutes.
15. If using the cheesecloth method, remove the cloth immediately (careful, will be hot). If using aluminum, let the roll cool before peeling off the foil. You want to keep the breading intact.

Serve on top of saltine crackers.

View blog post here.

Carne Fria

This translates literally to "Cold Meat" but I’ll be darned if I call it that. So I call it by its proper name, carne fria, and hope that as with arroz con pollo and picadillo, it becomes something that is called what it’s called.

I am fortunate enough to have had all four grandparents for the majority of my life (thus far). My maternal grandfather (Abuelo Cuco) passed away when I was twenty one, my maternal grandmother (Abuela Pupú) just a little over two years ago and my paternal grandfather (Abuelo Pepín) just a few months afterwards. Abuela Victorina, my paternal grandmother that’s fortunately still with us is the one that taught me how to make carne fria.

I remember there was always at least a couple of carne fria rolls in my grandparents’ house and since our house was right next to their house, I had carne fria on a regular basis. When I started The Project, I remember getting my grandmother’s copy of Cocina al Minuto and finding that her book actually opened right to the carne fria recipe. That’s when I decided that she’d be Abuela Carne Fria for my stories and Abuela Pupú would be dubbed Abuela Croqueta. Man, she made a mean croqueta. Homemade salsa béchamel and everything. Well, that’s for another post.

When I was a teenager, I remember Abuela Carne Fria teaching me how to make her signature dish. It was the first time I got my hands into raw meat to mix it together and my first time around boiling water. I still remember how excited I was when she said they were ready and that we’d be able to unwrap them and try them. It’s pretty much like unwrapping a gift on Christmas morning. Especially, as I now have experienced, if you’re able to keep the breading completely on as you gently unroll the fully cooled log. What a treat.

Recipe #77: Carne Fria


I found it appropriate that I would make Abuela Carne Fria’s dish for our annual Sarasota family vacation. There are so many traditions that I long for all year as we get ready for this trip. The nightly games of Mentirosa, the kids playing in the sand until sunset, the sound of the airhorn right when the sun dips into the horizon and the carne fria made each year by Gordo. Gordo is our very own Carne Fria King. Just like my family had my grandmother’s carne fria, my husband has Gordo’s.

IMG 748

On the night before the trip to Sarasota, practical me decided that packing for the whole family and making carne fria wouldn’t be impossible. It sure wasn’t impossible, but it sure was dumb. I was up until 4am. But boy was I proud of my four carne fria rolls.

I found out when I got to Sarasota that Gordo had made eighteen rolls.

I kept my carne fria a secret from Gordo for as long as I could. But, since his kids follow La Cocina on Facebook, they knew what I was up to. By Wednesday afternoon, I had no choice but to bring down my carne fria for examination. I felt like the Bobby Flay Throwdown people must feel.

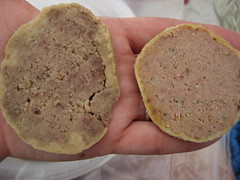
I cut it up for everyone and when Gordo tried it and said it was good, I was thrilled. We compared notes and he makes his with some slight variations, but he agreed that mine was a good competitor to his. Note, his is the one on the right - tight, compact. Mine is the looser one on the left.

IMG 751

I was thrilled.

Mixing the meat in the food processor and then blending the garlic, onion, salt, mustard, Worcestershire sauce, pepper, nutmeg, cumin, oregano, eggs and galleta molida (ground Cuban crackers) in the same food processor, then mixing it with your hands all together was magic.

Not only had I made Abuela Carne Fria’s dish without much difficulty, but it actually tasted right. When I told Gordo that I had used a tela (piece of fabric, or in this case, cheesecloth) in one of the rolls and the rest of aluminum foil, he nodded his head because when you boil the carne fria, wrapped in tela, the garlic, onions and seasonings in the water seep into the meat nicely. You obviously don’t get the same effect when you boil it in aluminum foil. You could really taste the difference.

IMG 448


We also discussed that it was key to pass the rolls through the egg and galleta molida twice in order to get that perfect crust around the roll. Success.

Carne fria is now down and perfect. Now it’s time for the croqueta. I promised my friend, Burger Beast, that I’d make the croqueta in another one of our cooking sessions. Let’s see if I can make my Abuela Croqueta as proud as I made Abuela Carne Fria.

My grandmother actually had a chance to taste my carne fria and she called me right away to tell me she loved it. She said it was the best she’d tasted. When I reminded her that she was the one that had taught me, she said, "My recipe? Oh no. Yours tastes much better than mine". Maybe it was the food processor I used instead of my hands to compact the flavors just right. Whatever the difference, I’m glad the carne fria can live on in my family now.

Sunday, July 11, 2010

93: Mayonesa Rosada (Pink Mayonnaise)

Ingredients:
1 egg
1 Tablespoon + 1 teaspoon lemon juice
1 teaspoon white vinegar
½ teaspoon salt
½ teaspoon white sugar
2 Tablespoon ketchup
¾ cup oil (I used vegetable oil. Would recommend cutting down to ½ cup to make it thicker. My ¾ cup made the mayo too liquidy.)

1. In a blender, mix the egg, lemon juice, vinegar, salt, sugar and ketchup until well blended.
2. Remove the insert from the top of the lid and pour in the oil as you blend the ingredients again.
3. Let the blender run until all the ingredients are mixed evenly.

Makes one cup.

92: Mayonesa Mostaza (Mustard Mayonnaise)

Ingredients:
1 egg
1 teaspoon lemon juice
1 teaspoon white vinegar
½ teaspoon salt
½ teaspoon white sugar
1 Tablespoon yellow mustard
¾ cup oil (I used vegetable oil. Would recommend cutting down to ½ cup to make it thicker. My ¾ cup made the mayo too liquidy.)

1. In a blender, mix the egg, lemon juice, vinegar, salt. sugar and mustard until well blended.
2. Remove the insert from the top of the lid and pour in the oil as you blend the ingredients again.
3. Let the blender run until all the ingredients are mixed evenly.

Makes one cup.

91: Salsa Mayonesa (Mayonnaise)

Ingredients:
1 egg
1 teaspoon lemon juice
1 teaspoon white vinegar
½ teaspoon salt
½ teaspoon white sugar
¾ cup oil (I used vegetable oil. Would recommend cutting down to ½ cup to make it thicker. My ¾ cup made the mayo too liquidy.)


1. In a blender, mix the egg, lemon juice, vinegar, salt and sugar until well blended.
2. Remove the insert from the top of the lid and pour in the oil as you blend the ingredients again.
3. Let the blender run until all the ingredients are mixed evenly.


Makes one cup.

Mayonnaise.

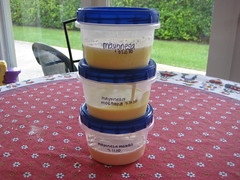
For no good reason (besides the insanity of The Project and the thought of knocking out three recipes all at once), I decided to make three mayonnaise recipes in one shot.

Mayo, Mayo Mostaza, Mayo Rosada

Besides the oddity of making mayo yourself (I mean, really, why?). This recipe was quite educational. The way that the lemon, oil and eggs worked together was quite, well, magical.


I know, I know. It’s only mayo. But, give it a try for yourself, and you’ll see why real Cuban mayo tastes more like Miracle Whip than the mayo we use and what a great veggie dip the mustard and pink varieties make, just as they are.


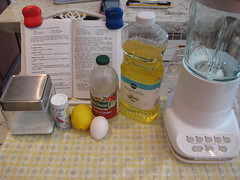
Recipe #310: Salsa Mayonesa

ingredients mayonesa

This recipe calls for ¾ cup oil (I used vegetable oil) and it came out too runny. The next ones called for ½ cup and I recommend using ½ cup each time.

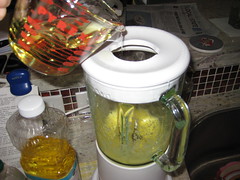
adding the oil

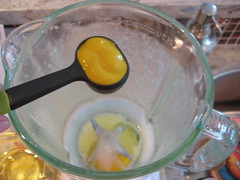
With a blender, you’re done with each recipe in less than 5 minutes. If you’re so inclined, you could have homemade mayo in the fridge at all times. I’m not so inclined, but am happy to have learned how it works.

Recipe #311: Mayonesa Mostaza

Add yellow mustard.

add the mustard

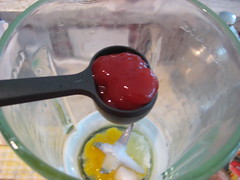
Recipe #312: Mayonesa Rosada

Add ketchup.

add the ketchup

My blender actually broke in the process – I guess from being in shock from all the use it’s been receiving this past year. But, thanks to Macy’s and the Kitchen Aid warranty that is just part of the package when you buy it, I walked in with my burnt out, 10 year old, wedding registry blender and walked out with my brand new, shiny red blender. What a treat.
Sunday, July 4, 2010

90: Bolita de Queso / Cheese Ball

Ingredients:
1 bar cream cheese
1/4 cup almonds, chopped and toasted (optional)
2 sweet pickles (or sweet salad cubes)
10 olives, stuffed with pimento, chopped

1. Beat the cream cheese until softened.
2. Add the sweet pickles and chopped olives.
3. Place the mixture on a sheet of plastic wrap and form into a ball.
4. Place the ball in the fridge until you're ready to coat with the almonds.
5. Place the almonds on a plate and roll the ball through the almonds until fully coated.

Serve with crackers or raw vegetables.

Recipes to Tweet By - Six Ingredients or Less

We’re fortunate enough to spend time in the Keys often. In January, my husband went back to school to get his MBA. His program runs on Saturdays only, for two years, and this summer marked the ¼ mark of his progress. When it was time to decide what we’d do for the Fourth of July, we were packed and in the Keys before we could think twice.

Whenever I’m faced with free time (defined as time with my hubby and/or my parents/in-laws help me with the kids), I cook. So, I tackled a total of four recipes during the course of the weekend.

I picked easy ones. I wanted ones with five ingredients or less, but found one that had six, so that’s why this post is titled as such. I wanted to enjoy some real non-cooking free time with hubby as well.

What makes them easy? Well, it’s more that they’re simple. They’re so simple, I can tweet the recipe. So, all these recipes are composed of instructions, in less than 140 characters.

For the traditionalists, I do have the full recipes listed, just a click away. As always, click on the title of the dish and you’re taken to the full recipe, in English.

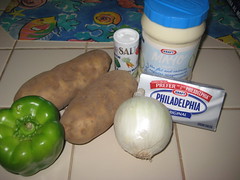
Recipe #330: Ensalada de Papas (Potato Salad)

Ensalada de Papas ingredients - simple

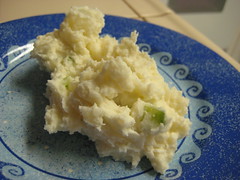
The first recipe, a Fourth of July tradition, is Potato Salad. This ensalada de papas is not loaded with (too much) mayo and tastes fresh.

Peel, cube potatoes. Boil until soft. Add chopped onions, pepper. Mix. Fridge 1 hr. Beat cream cheese and mayo and add to potatoes. Serve.

Ensalada de Papas

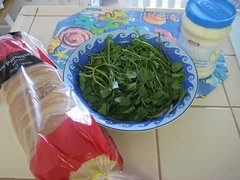
Recipe #610: Bocaditos de Berro con Mayonesa

Ingredients for con Mayonesa

This recipe has three ingredients.

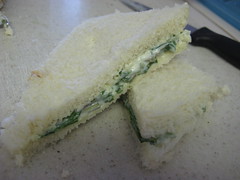
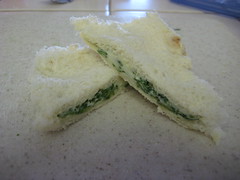
Chop watercress. Add mayo. Mix well. Cut crusts off bread. Spread paste between 2 slices bread. Cut into triangles. Enjoy.

Bocadito de Berro con Mayonesa

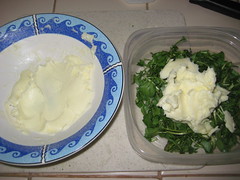
Recipe #609: Bocaditos de Berro con Mantequilla

Adding the beaten butter

This recipe also has three ingredients. And just requires one extra step – beating the butter before adding it to the watercress.

Chop watercress. Add beaten butter. Mix well. Cut crusts off bread. Spread paste between 2 slices bread. Cut into triangles. Enjoy.

Bocadito de Berro con Mantequilla

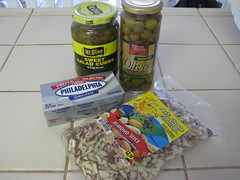
Recipe #624: Bolitas de Queso

Ingredients Bolitas de Queso

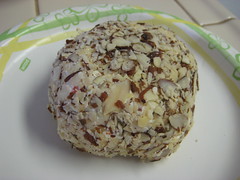
This recipe has four ingredients. I didn’t have little petit fours papers, which is what I think she’s looking for when she asks for capacillo pequeño de papel. So, instead of making little cheese balls, I made one large Bola de Queso.

And fine, I know this tweet is a stretch, but it’s in less than 140 characters (3 to spare, actually), so it counts.

Beat room temp cream cheese/Add chopped sweet pickles+olives/Blend/Form large ball/Wrap ball/Fridge/Unwrap/Roll in slivered almonds/Enjoy

Bolita de Queso

Four more down for the Fourth of July. And, some quality time with the family. Who knows, maybe I can find more Nitza recipes to Tweet.

Ha. I doubt it.